Monday, January 31, 2011

Macaroni and Cheese

Img_4368

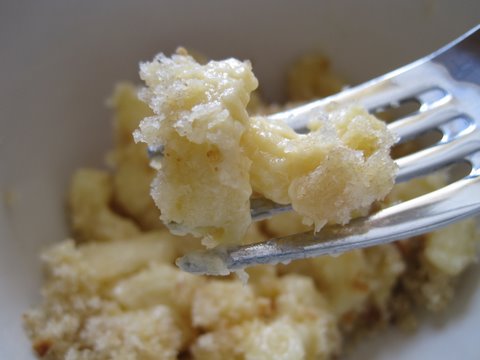
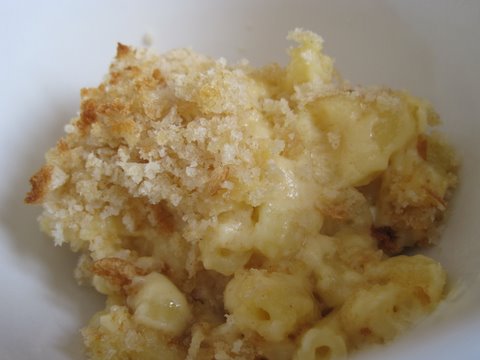
When I have a craving for macaroni and cheese, I am perfectly happy with a blue box of Kraft. I don't know exactly what it is, but I love the stuff! Last week for book club, however, I made a slightly more sophisticated macaroni and cheese that turned out to be delicious! Here is the recipe:

Ingredients:

  • 6 slices bread
  • 3 T butter
  • 1 lb. elbow macaroni
  • 5 T butter
  • 6 T flour
  • 1 1/2 t. dry mustard
  • 1 t. salt
  • 1/4 to 1/2 t. cayenne pepper
  • 5 c. milk
  • 1 lb. shredded cheese, 1/2 extra sharp cheddar, 1/2 monterrey or colby jack

Instructions:

Pulse 6 slices of bread and 3 T butter in a food processor until it is your desired crumb size (fine-ish crumbs). Set aside.

Boil approximately 4 qt. water; Add 1 T salt to the water. Add 1 lb. elbow macaroni, and cook for about 6 minutes, until the pasta is just before al dente (slightly under-cooked, the pasta will cook some more once it is in the sauce).

Drain the pasta, and using the same pot you made the pasta in, melt 5 T butter over medium heat. Whisk in 6 T flour, getting rid of any lumps that may form. Cook for about 2 minutes until the mixture turns a tawny color. Whisk in 1 1/2 t. dry mustard, 1 t. salt, and 1/4 to 1/2 t. cayenne pepper. Then, whisk in 5 c. milk. Turn heat up a little, and bring to a boil, stirring periodically. Once mixture comes to a boil, reduce heat to medium and cook until thick, about 2-5 minutes. Then, stir in 1 lb. of shredded cheese a little at a time. I used 1/2 lb. of extra sharp cheddar, and 1/2 lb. colby jack. Stir in the drained pasta, and let it cook on medium-low heat for about 5 minutes. Transfer to a 9X13 broiler-safe baking dish and top with bread crumb mixture. Place under the broiler for 2 minutes, with the dish on the lower oven rack.

Enjoy!

Img_4369

Sunday, January 30, 2011

Cheese Nachos - Joe T.'s style

Img_4411

Joe T. Garcia's is a classic Tex-Mex restaurant in Fort Worth, TX. Whenever we are in Fort Worth we visit Joe T.'s for a wonderful family style meal. They always bring out simple cheese nachos as the first course, and they are extremely delicious!

Making these cheese nachos at home is incredibly simple... you only need 3 ingredients:

  • Chips
  • Jalapenos
  • Cheese

Img_4412

The assembly is incredibly simple too!

All you do is place a layer of chips on a baking sheet, cover them with cheese, and then place sliced jalapenos on top. To finish, you place them under the broiler until the cheese is bubbly and melted.

I cut the seeds out of the jalapenos first, because we don't like things too hot, but the nachos would be delicious any way you sliced the jalapenos - or even with pickled jalapenos! Additionally, I used shredded extra sharp cheddar cheese on these nachos, but any kind of cheese would work. I'm sure monterrey jack would be delicous. Enjoy!

Img_4413

Monday, January 24, 2011

Not your typical hamburger story...

Tuesday night, Jamie and I ate hamburgers. I was inspired by the Lodge grill pan that I recently acquired, and it turned out to be a wonderful meal! I scoured websites for hamburger recipes, and was once again inspired by PW. See her Favorite Burger to see the recipe that inspired mine!

No pictures exist of the hamburgers for two reasons: 1. the lighting is terrible in my apartment at night, and 2. the grill pan started smoking, causing the fire alarm to continuously go off, causing lots of stress and craziness in our apartment. The pictures actually would have been quite fun to see - Jamie fanning the alarm with a pillow and frantically trying to get a fan out from under our bed, and me continuing on with my burger adventure...

Anyways, here is what I did, in words, not pictures, and I highly recommend making these burgers! 

Ingredients:

  • 1 Red onion
  • 2 T butter
  • 2 T brown sugar
  • 1 lb. 85/15 ground beef
  • garlic powder
  • pepper
  • salt
  • Tabasco sauce
  • 4 Sourdough Rolls (I used Trader Joe's bake-at-home rolls... yum!)
  • butter (for spreading on rolls)
  • a couple spoonfulls of mayonnaise
  • about 2 oz. goat cheese
  • Arugula

Instructions:

Heat up grill pan on medium high heat.

Heat 2 T butter in a skillet. Slice red onion onion, and add to melted butter. Add 2 T brown sugar, and stir. Cook on low for about 20 minutes.

Mix beef with some garlic powder, salt, pepper, and Tabasco sauce. No need to measure! Split into four evenly sized patties, and put them on the hot grill pan!

Slice rolls in half, and spread with butter. Place these on the grill pan as well. Flip the burgers after about 5 minutes or so, whenever you feel that they are about halfway done, according to how you like your burgers cooked! Take the rolls off as soon as they are lightly toasted.

In the mean-time, mix the mayonnaise with a little tabasco to make a spicy mayo. When the burgers are done, spread a little spicy mayo on the rolls, and place the burgers topped with onions, goat cheese, and arugula in between the two ends of the rolls... they will be absolutely delicious, and I will make them again sometime and post a picture :)

Also, We made them alongside Trader Joe's garlic fries, which were very tasty with this burger! They have a LOT of garlic, and are very strong, so if you don't like garlic, they are not for you, but if you do like garlic, you'll love 'em!


Sunday, January 23, 2011

Laptop Sleeve... Step by Step!

Img_4367

Today (Sunday) = sewing day! I thought I would share my project, as this is the 5th one of these I have made for friends and family, and I was finally able to take pictures of the process (sort of - some steps are definitely lacking in the picture-area). They're pretty easy, and fun to make - the part that is the hardest for me is sewing on the buttons :)

Img_4336

I started with three layers of fabric: one denim, one cute print, and one batting layer. I placed the denim and print fabrics right-side together, and then placed the batting on the bottom of the two layers. See the photo above. I then cut a large rectangle the size I needed. The laptop I made this for had the dimensions 14" W X 10.5" L X 1.5" H, so I calculated that the finished case should be 15.5" X 13" (by adding 1.5" to the W and L dimensions), added some extra fabric to the sides for the hems, multiplied the L by 2.5 (to account for the back of case and fold-down section), and cut my piece to 17" X 35". Yes, it is very confusing, and it is a miracle any of these cases end up fitting the laptops they're supposed to fit!

Img_4337

So I pinned around the edges,

Img_4343

measured 26" from where the bottom seam will be to the top, and arranged the pins at that point to go inward, to create a triangle at the top, then I cut along the pins, leaving an inch or so extra:

Img_4345

I checked all of my measurements:

Img_4339
Img_4342

and started sewing..

Img_4347

Once I sewed the perimeter of the piece (leaving the flat edge at the bottom un-sewed), I trimmed the edges, so they wouldn't be too bulky in the finished piece:

Img_4349

See, they're nice and trimmed (but not perfect!):

Img_4350

I flipped the whole piece inside out, and here is what I had:

Img_4352

So, I folded down the bottom un-sewn side, and sewed it shut:

Img_4355

Here is what the seam looks like:

Img_4357

The next step was to sew the whole thing together. I folded it up, leaving the triangular top part exposed, and sewed around all of the edges.

Img_4359

I sewed on the buttons and here is what I had:

Img_4360

Pretty cool, huh?

Img_4361

I tied some twine to one of the buttons so that it can be wrapped around them to close the case!

Img_4363

The finished product:

Img_4364

So pretty!

Img_4365

Tuesday, January 11, 2011

Pizza with Prosciutto and Goat Cheese

Img_4179
I love to make homemade pizza - it is relatively easy, and extremely delicious!

Thanks to Lisa, I found a secret ingredient that really makes the pizza: Don Pepino's pizza sauce. It tastes fresh, is flavorful, and just all around adds a little something extra to the pizza. It comes in this cool vintage-looking can:

Img_4164

My other secret ingredient is goat cheese. I am absolutely obsessed with the stuff, and for good reason. I use it along with mozzarella, and it adds a creamy texture, and a unique flavor to the pizza. The Trader Joe's brand is especially wonderful, as it is not too strong or overpowering:

Img_4167

For this particular pizza, I decided to use prosciutto as the meat. I'm almost as obsessed with prosciuttio as I am with goat cheese, but not quite as much. Sometimes I use sausage for the meat, and sometimes pepperoni. It would probably be good with all of the meats combined, too!

Img_4170

I also decided to use caramelized sweet onions, so I sliced up an onion, and sauteed it over medium-high heat until...

Img_4161

... it looked like this:

Img_4171

The below gallery shows the progression of my pizza from dough (I used Trader Joe's pizza dough) to finished product. I do not have a pizza stone, but I find it to be helpful to put the pan that I use to cook the pizza into the oven while it preheats so that the pan gets really hot, and the crust will cook a little while I am assembling the pizza on top of it. I set my oven to 450 degrees, and it took about 15 minutes for the pizza to bake.

Img_4172Img_4173Img_4174Img_4175Img_4176Img_4177Img_4178

Look at that yummy goat cheese:

Img_4181

So delicious!

Img_4182

We ate the whole pizza in one sitting...

Img_4183

...AND we were lucky enough to pair it with Trader Joe's Vintage Ale, which was an excellent choice!

Img_4184

It went really well with the pizza.

Img_4185

I'm not usually one for dark beers, but this one wasn't too heavy or strong. It was Belgian-style, and honestly, I thought it smelled exactly like Blue Moon. It also tasted similar, but had more complex flavors. If there is a Trader Joe's near you, give it a try! Cheers!

Img_4192

Monday, January 10, 2011

Football Dip

Cheese

Over the past three weeks, my life has been full of TOO MUCH FOOTBALL!!! It seems neverending, but hopefully it will end soon. There is one thing that makes football better, though: Queso!

Queso is a challenge for me because I have been trying for the past two years to make my queso taste like the queso you can get at restaurants in Texas. I started with the traditional Velveeta/Rotel combo, progressed to adding my own salsa instead of Rotel, then attempted to make the dip completely from scratch using Homesick Texan's recipe. I was never very happy with my results, as it was never as good as Texas queso. I think I would have been happy with the Homesick Texan recipe (the taste was amazing), but I could never find the right cheese that would melt the right way so my dip was always the wrong consistency. I developed a theory that all restaurants use some kind of secret cheese (Velveeta) that melts perfectly every time.

A few months ago, Jamie and I uncovered a secret on the back of the Jimmy Dean sausage label:

Sausage

Jamie really wanted me to make it for him, so I did, and we were very pleasantly surprised with the results. It's still no Trudy's, but it is definitely a step above the traditional Velveeta/Rotel. The recipe calls for 2 lbs. of sausage and Velveeta, but I have no idea what I would do with that much queso, so I scaled down the recipe a bit:

Sausage Queso Dip

You need:

1/2 lb. Jimmy Dean Sausage
1/2 lb. Velveeta 2% milk cheese
1/2 can of Rotel
about 1/4 cup of salsa
about 1/4 cup of green onions

Do this:

Brown the sausage over medium-high heat, until it is no longer pink. Add the Rotel, cover, and cook for 2 minutes. Add the cheese and salsa, and cook until melted. Sprinkle green onions over the top, and serve.


Now you have a yummy football snack, and football is much more tolerable!!! 

Also - I must confess that I made this dip twice this weekend, and the first time I skipped out on the green onions. Big mistake - they add great fresh flavor that makes the dip much better!

Saturday, January 8, 2011

Texas Cookies

Img_4139

I have been dying to use my Texas cookie cutters for about a month! I got even more for Christmas, so I was even more excited to start making some really cute cookies.

Img_4135

I started out by making the same cookie dough I made when my sister and I baked Turkey Cookies at Thanksgiving. It is Paula Deen's recipe for Snowflake Cookies.

Img_4140

I cut out my fun Texas shapes, and baked them for 10 minutes at 350!

Img_4141

I let them cool, and then made royal icing from Bake at 350. She has such a cute website. The icing came out great!

I iced these cookies in honor of my friend Andrew, in celebration of the A&M bowl game yesterday! Yes, I wished I had been using burnt orange frosting, but that day will come soon enough... And I learned a very important lesson about icing gel colors - you have to buy ones that are "tasteless" otherwise the color will impart a very bitter taste into the icing. These bright marroon cookies ended up just being good for decoration, and I iced some with white icing that tasted better. I'll have to get some better icing food colors soon!

Img_4143