Wow. I've been meaning to post the recipe for these tostadas for over a month. Lately, it's been so crazy that we've been eating Chipotle and pizza all the time...
These tostadas are great. They take a while to cook, but most of it is inactive cooking time so you can start them and then do other things while they are cooking. Also, I absolutely LOVE the freshly fried tortilla tostada shells... yum, yum, yum! The recipe is adapted from America's Test Kitchen... enjoy!
Pork Tinga adapted from ATK
2 or 3 pounds boneless pork butt, trimmed of excess fat and cut into 1-inch pieces
2 medium onions, 1 quartered and 1 chopped fine
5 medium garlic cloves, 3 peeled and smashed and 2 pressed through garlic press
1 T dried thyme
Salt
2 tablespoons olive oil
1/2 teaspoon dried oregano
1 (14.5-ounce) can tomato sauce
1 tablespoon ground chipotle powder OR 1 to 2 chopped "Chipotle Peppers in Adobo Sauce" (comes in a can)
2 bay leaves
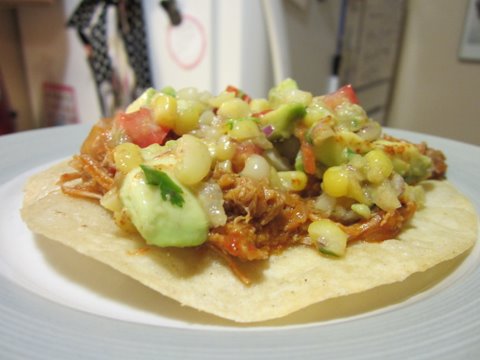
Tostadas3/4 cup vegetable oil
12 (6-inch) corn tortillas (see note)
Salt
Garnishes
Queso fresco or monterrey jack cheese
Fresh cilantro leaves
Sour cream
Diced avocado
Lime wedges
Another great garnish is roasted corn salsa - Click Here to see Mark Bittman's corn salsa recipe.
INSTRUCTIONS
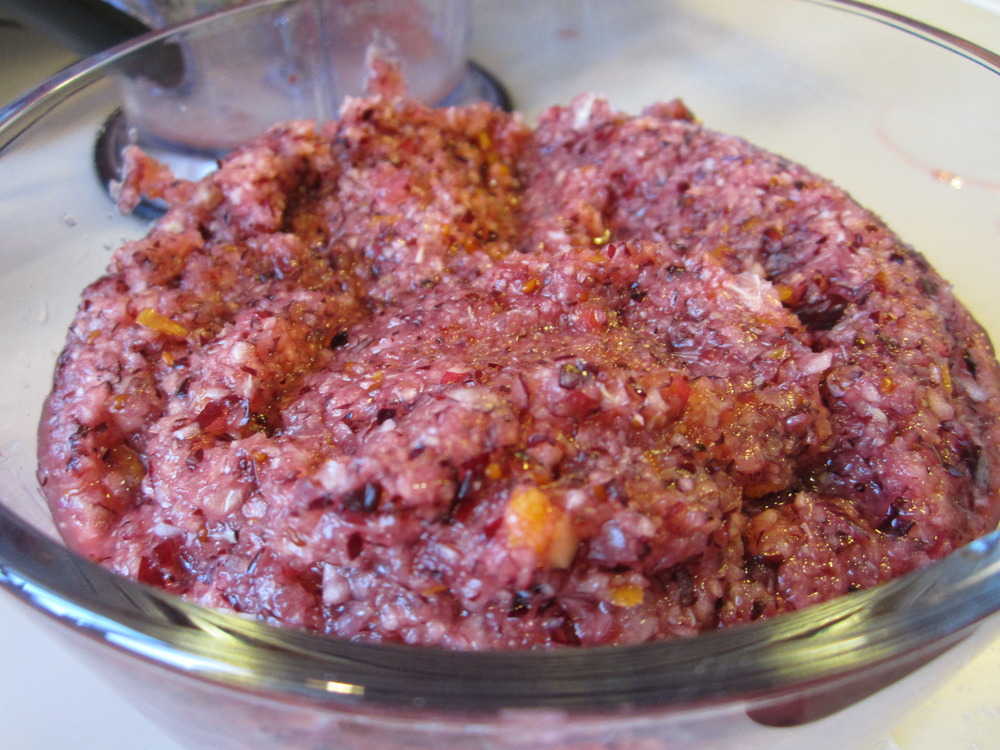
1. FOR THE TINGA: Bring pork, quartered onion, smashed garlic cloves, thyme, about 1 teaspoon salt, and 6 cups water to simmer in large saucepan over medium-high heat, skimming off any foam that rises to surface. Reduce heat to medium-low, partially cover, and cook until pork is tender, 75 to 90 minutes. Drain pork, reserving 1 cup cooking liquid. Discard onion, garlic, and thyme. Return pork to saucepan and, using potato masher, mash until shredded into rough ½-inch pieces, and set aside.
2. Heat olive oil in 12-inch nonstick skillet over medium-high heat until shimmering. Add shredded pork, chopped onion, and oregano; cook, stirring often, until pork is well browned and crisp, 7 to 10 minutes. Add minced garlic and cook until fragrant, about 30 seconds.
3. Stir in tomato sauce, chipotle powder or chiles, reserved pork cooking liquid, and bay leaves; simmer until almost all liquid has evaporated, 5 to 7 minutes. Remove and discard bay leaves and season with salt to taste.
4. TO FRY TOSTADAS: Heat vegetable oil in 8-inch heavy-bottomed skillet over medium heat to 350 degrees. Using fork, poke center of each tortilla 3 or 4 times (to prevent puffing and allow for even cooking). Fry 1 at a time, holding metal potato masher in upright position on top of tortilla to keep it submerged until crisp and lightly browned, 45 to 60 seconds (no flipping is necessary if you use the masher). Drain on paper towel-lined plate and season with salt to taste. Repeat with remaining tortillas.
5. TO SERVE: Spoon small amount of shredded pork onto center of each tostada and serve, passing garnishes separately.